
If you’re craving a dish that’s crispy, juicy, and bursting with buttery garlic flavor, then this chicken kiev recipe is exactly what you need. A classic favorite that’s easier to make than you think, this golden, mouthwatering delight will have everyone at the table asking for seconds. Ready to discover the secret to its irresistible crunch and rich, herby center? Keep reading—you won’t want to miss this!
Chicken Kiev Recipe
| Servings: | 4 |
| Prep Time: | 30 minutes |
| Cook Time: | 25 minutes |
| Total Time: | 55 minutes |
| Serving Size: | 1 stuffed chicken breast |
Description
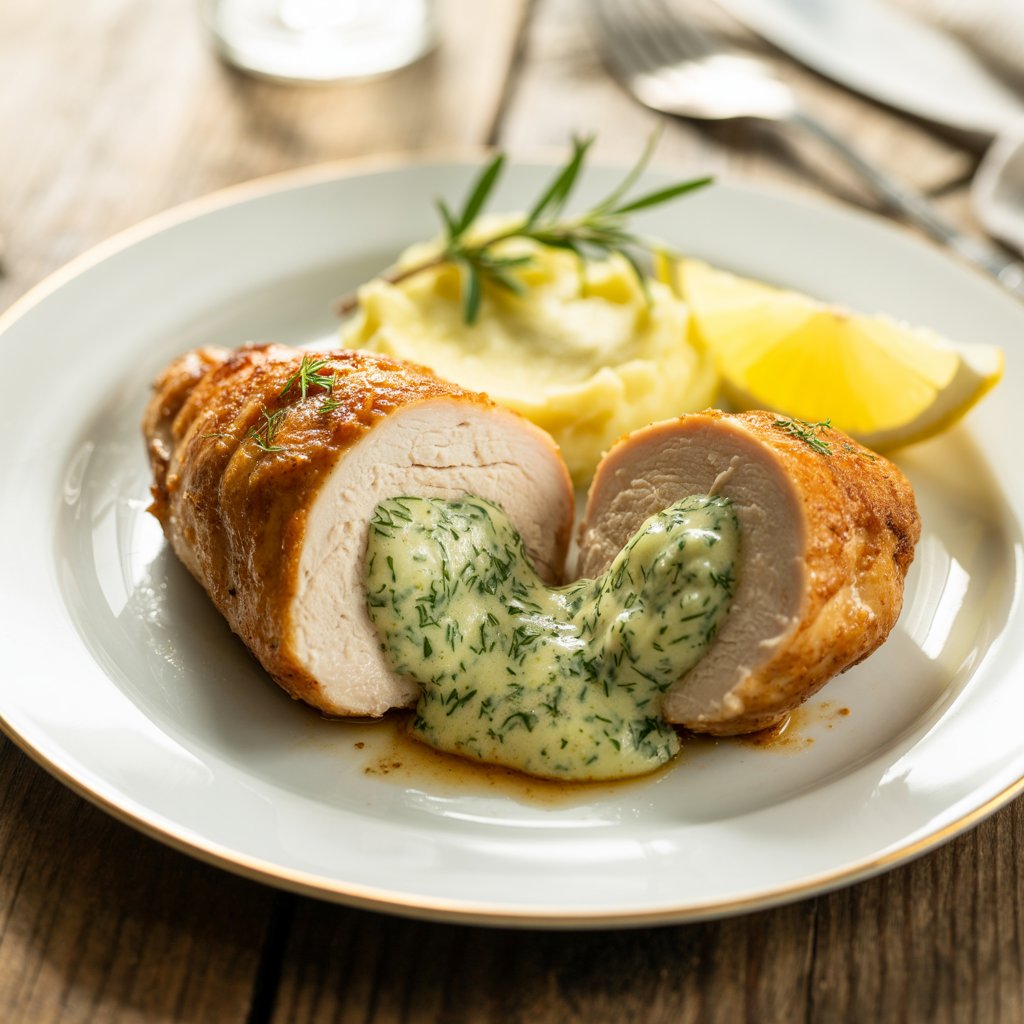
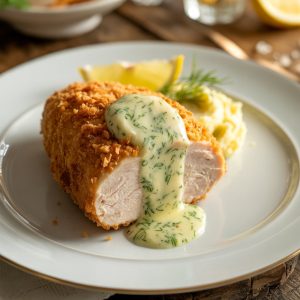
Golden and crisp on the outside with a warm, garlicky herb butter oozing from the center, Chicken Kiev is a dish that feels like an indulgent treasure chest of flavor. The first cut through the beautifully fried chicken breast is rewarding, revealing a pool of melted butter infused with fresh parsley, garlic, and a hint of lemon. It is elegant yet comforting, a timeless classic that effortlessly straddles the line between home-cooked comfort and restaurant-worthy presentation.
Chicken Kiev offers a sensory experience that begins with the crunch of the breadcrumb crust and follows with the tender juiciness of the chicken, all enriched by a luscious buttery explosion. It evokes old-world charm with every bite, like sitting at Sunday dinner in a grand dining room with soft classical music playing and a heavy linen napkin in your lap. Yet it is simple enough to make in your own kitchen with just a bit of preparation.
Why You’ll Love This Recipe
This Chicken Kiev recipe brings together classic flavor with easy-to-follow steps, making it ideal for both special occasions and weeknight dinners. The herb butter can be made days in advance, and the chicken can be prepped ahead and frozen for future meals. Even better, the ingredients are familiar and affordable, turning a seemingly sophisticated entrée into an approachable dish for any home cook.
You will appreciate the flexibility too. Serve it over mashed potatoes, rice, or even a crisp green salad for a lighter option. Plus, with the rich filling and crispy coating, it is a hit with both kids and adults. Once you master it, Chicken Kiev will become a go-to for dinner parties and holiday meals alike.
Serving and Storage Tips
Serve Chicken Kiev hot and freshly cooked to enjoy the full experience of the melting butter center. Pair it with mashed potatoes, roasted vegetables, or a fresh garden salad.
Store any leftovers in an airtight container in the refrigerator for up to 3 days. Reheat in the oven at 350 degrees Fahrenheit for 10 to 15 minutes until hot and crispy again. Avoid microwaving, as it may cause the coating to become soggy.
For make-ahead convenience, prepare the chicken through the breading step, then freeze on a baking sheet until solid. Transfer to a freezer-safe bag and store for up to 1 month. Cook directly from frozen by adding 5 to 10 minutes to the cook time.
Ingredients
- 8 tablespoons unsalted butter
- 2 tablespoons finely chopped fresh parsley
- 2 garlic cloves minced
- 1 teaspoon lemon zest
- 4 boneless skinless chicken breasts
- 1 teaspoon salt
- 1 teaspoon black pepper
- 1 cup all-purpose flour
- 2 large eggs
- 1 tablespoon milk
- 2 cups breadcrumbs
- Vegetable oil for frying
Equipment
- Mixing bowl
- Plastic wrap
- Meat mallet or rolling pin
- Sharp knife
- Cutting board
- Three shallow bowls
- Tongs
- Large skillet
- Oven-safe baking sheet
- Paper towels
Instructions
- Step 1: In a small mixing bowl, combine the softened butter, parsley, garlic, and lemon zest. Mix thoroughly until it looks like a green-speckled butter blend.
- Step 2: Place the butter mixture on plastic wrap. Shape it into a log about 1 inch thick. Wrap it tight and refrigerate until firm. I often make this the day before.
- Step 3: Between two sheets of plastic wrap, gently flatten each chicken breast until about ½ inch thick using a meat mallet. This step makes the chicken cook evenly and roll easily.
- Step 4: Season both sides of each flattened chicken breast with salt and pepper. Be generous—the chicken needs that flavor boost.
- Step 5: Slice your chilled herb butter into four equal discs. Place one in the center of each chicken breast.
- Step 6: Tuck in the sides and roll the chicken tightly around the butter. Think burrito. Wrap each piece in plastic wrap to hold shape and freeze for 30 minutes. This helps the butter stay inside during cooking.
- Step 7: Prepare three shallow bowls: flour in one, eggs whisked with milk in the second, and breadcrumbs in the third. This is your breading station.
- Step 8: Remove chicken from the freezer. Unwrap and dip each roll in flour, then the egg mixture, and finally coat thoroughly in breadcrumbs. Press gently to make sure the crumbs stick.
- Step 9: In a large skillet, heat 1 inch of vegetable oil over medium-high heat. You want it hot but not smoking—about 350 degrees Fahrenheit is perfect.
- Step 10: Carefully place chicken rolls into the hot oil with tongs. Fry each side for 3 to 4 minutes until golden. Do this in batches so you don’t cool down the oil.
- Step 11: Transfer fried chicken to a baking sheet and finish in a 375 degree Fahrenheit oven for 15 to 20 minutes or until internal temperature hits 165 degrees Fahrenheit.
- Step 12: Let the chicken rest for 5 minutes before serving. That melted butter inside needs a moment to settle.
Nutrition per serving
| Calories | 320 |
| Protein | 25g |
| Carbohydrates | 3g |
| Fat | 22g |
| Sugar | 0g |
| Fiber | 0g |
| Sodium | 580mg |
For extra flavor, use freshly grated Parmesan and do not skip the lemon zest. Leftovers keep well for 2 days in the fridge.
FAQ
Can I use chicken thighs instead of breasts?
Boneless skinless chicken thighs can be used, but they are smaller and more difficult to roll tightly around the butter. If using thighs, try doubling up or flattening them very thinly.
What breadcrumbs work best for this?
I recommend using plain or panko breadcrumbs. Panko gives a crispier result, while plain breadcrumbs stick a bit more evenly. You can also mix in some dried herbs for added flavor.
How long can I keep the prepared chicken in the freezer?
Breaded and wrapped Chicken Kiev can be frozen for up to one month. Be sure the chicken is well-wrapped and placed in an airtight freezer bag to prevent freezer burn.
We hope you enjoyed this article about Chicken Kiev recipe! If you found it helpful or inspiring, please consider pinning the article or any image from it on Pinterest — this helps more food lovers discover our content. Don’t forget to like the pin and leave a comment — we truly appreciate your support, and it motivates us to keep creating even better content for you!
Chicken Kiev
Ingredients
- 8 tablespoons unsalted butter
- 2 tablespoons finely chopped fresh parsley
- 2 garlic cloves minced
- 1 teaspoon lemon zest
- 4 boneless skinless chicken breasts
- 1 teaspoon salt
- 1 teaspoon black pepper
- 1 cup all-purpose flour
- 2 large eggs
- 1 tablespoon milk
- 2 cups breadcrumbs
- Vegetable oil for frying
Instructions
- In a small mixing bowl, combine softened butter, chopped parsley, minced garlic, and lemon zest. Mix until well blended.
- Transfer the butter mixture onto a piece of plastic wrap. Roll into a 1-inch thick log and refrigerate for at least 30 minutes or until firm.
- Gently pound each chicken breast to about ½ inch thickness between two sheets of plastic wrap, being careful not to tear the meat.
- Season each chicken breast on both sides with salt and pepper.
- Slice the chilled butter log into four equal portions. Place one piece of butter in the center of each chicken breast.
- Carefully fold the edges of the chicken over the butter and roll tightly, securing the sides so the butter does not leak out. Wrap each roll tightly in plastic wrap and freeze for 30 minutes to help maintain shape.
- Prepare your breading station: place flour in one shallow bowl, whisk eggs and milk in a second, and breadcrumbs in a third.
- Remove chicken from freezer. Unwrap and dredge each roll first in flour, then dip in egg mixture, and finally coat evenly in breadcrumbs. Press gently to adhere.
- In a large skillet, heat about 1 inch of vegetable oil over medium-high heat. Once the oil reaches 350°F (175°C), carefully lower the chicken rolls into the skillet using tongs.
- Fry for 3 to 4 minutes per side, or until golden brown. Do not overcrowd the pan.
- Transfer the browned chicken to an oven-safe baking sheet and place in a 375°F (190°C) oven for 15 to 20 minutes or until the internal temperature reaches 165°F (74°C).
- Let rest for 5 minutes before serving to allow the juices and butter center to settle.
