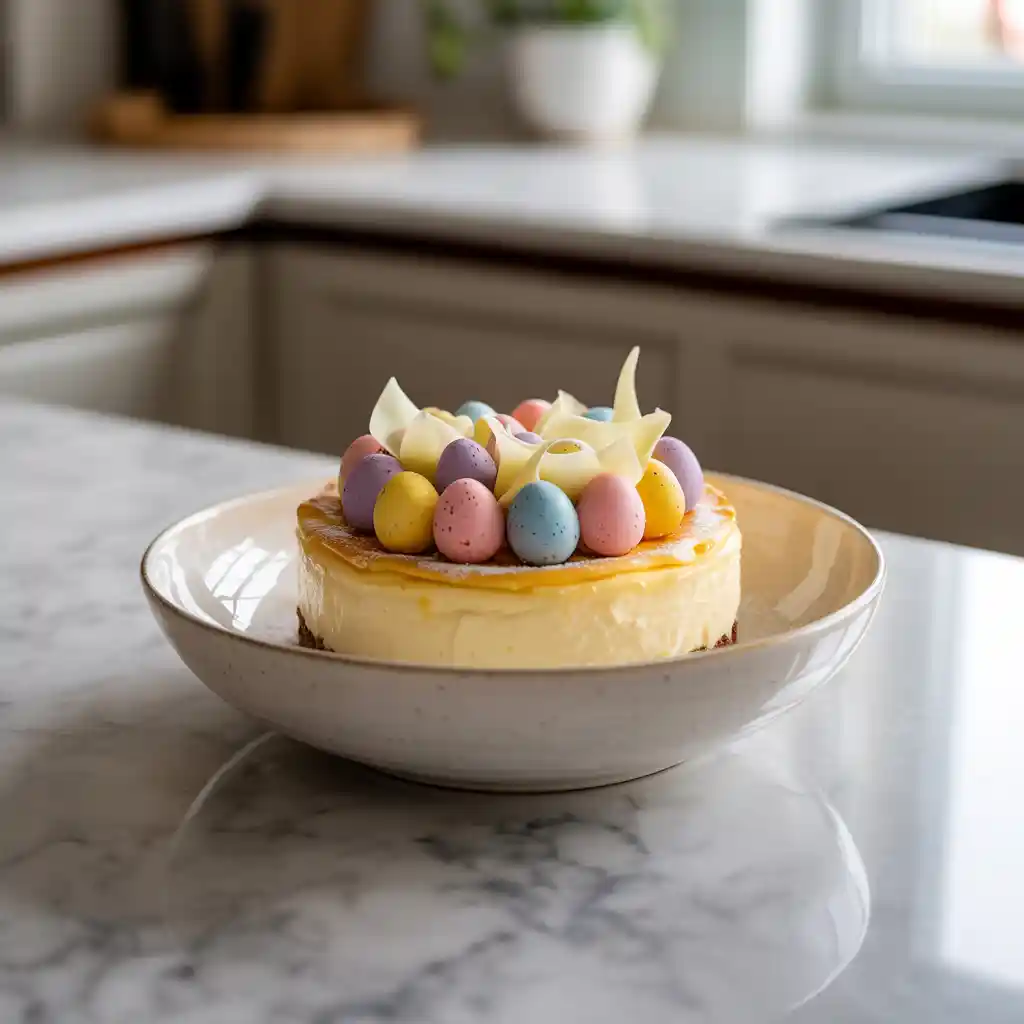
If you’re looking to impress this spring, the easter egg cheesecake is the show-stopping dessert you didn’t know you needed. With its eye-catching design and melt-in-your-mouth flavors, this treat brings a festive twist to a beloved classic. Ready to discover how to make your Easter unforgettable? Keep reading — a sweet surprise awaits.
| Servings: | 8 |
| Prep Time: | 25 minutes |
| Cook Time: | 0 minutes |
| Total Time: | 25 minutes |
| Serving Size: | 1 half egg |
Ingredients
- 4 large hollow chocolate Easter eggs
- 16 ounces cream cheese softened
- 1 cup powdered sugar
- 1 teaspoon vanilla extract
- 1 cup heavy whipping cream
- Gel food coloring in pastel shades
- Sprinkles or candy eggs for garnish
Equipment
- Mixing bowls
- Electric mixer
- Rubber spatula
- Piping bags
- Toothpicks or skewers
- Cooling rack or egg holders for display
- Serrated knife
Instructions
- Prepare the chocolate egg shells: Carefully unwrap the chocolate eggs. Use a serrated knife to slice each egg in half lengthwise along the molded seam. If they crack slightly, you can gently press them back together using a bit of melted chocolate as edible glue.
- Stabilize the egg halves: Nestle the hollow halves in an egg carton or balance them on a bed of uncooked rice in a shallow dish. This keeps them from wobbling while you fill them.
- Make the cheesecake base: In a large mixing bowl, beat the cream cheese until it is velvety and smooth. Be sure your cream cheese is fully softened so you avoid lumps.
- Sweeten and flavor: Add the powdered sugar gradually and continue beating until combined. Then mix in the vanilla extract. At this point, the mixture should be smooth and a bit fluffy.
- Whip the cream: In a separate bowl, beat the heavy cream until stiff peaks form. This adds lightness to your cheesecake texture.
- Fold and fluff: Gently fold the whipped cream into the cream cheese mixture using a rubber spatula. Do not stir too vigorously or you will lose the volume.
- Color the filling: Divide the cheesecake mixture into small bowls and add different pastel gel food colorings to each. I love using soft lavender, baby blue, blush pink, and mint green. For a marble look, spoon the colors into the shells and use a toothpick to gently swirl.
- Fill the shells: Use a piping bag or spoon to fill each egg half with the colorful cheesecake filling. You can layer different colors or swirl them for a festive look. Smooth out the tops with the back of a spoon.
- Decorate: Top with pastel sprinkles, candy-coated eggs, or edible glitter for a cheerful Easter finish.
- Chill and serve: Refrigerate the filled eggs for at least two hours or until set. Serve chilled and enjoy every creamy-sweet bite.
Nutrition per serving
| Calories | 380 |
| Protein | 4g |
| Carbohydrates | 30g |
| Fat | 28g |
| Sugar | 26g |
| Fiber | 1g |
| Sodium | 125mg |
Description
Sweet and whimsical, this Easter Egg Cheesecake is as delightful to look at as it is to eat. Imagine a velvety, creamy cheesecake nestled inside a chocolate Easter egg shell, swirled with pastel colors that dance across the surface like spring’s early blooms. Each spoonful delivers the blissful smoothness of classic New York-style cheesecake wrapped in the crunch of chocolate, creating the perfect contrast between rich and refreshing textures.
With its playful presentation and indulgent flavor, this dessert feels like opening a treasure trove of spring joy. Inspired by the excitement of Easter morning and hidden surprises, it transforms a traditional cheesecake into a festive showstopper. Whether you are hosting a family brunch or creating a special holiday treat with your kids, this Easter Egg Cheesecake is sure to become a new tradition that brings smiles and satisfies cravings.
Why You’ll Love This Recipe
This Easter Egg Cheesecake is surprisingly simple to make, even for beginner bakers. Using store-bought hollow chocolate eggs saves time and allows more focus on the luscious, homemade cheesecake filling. Its no-bake nature also means less time at the oven and more time enjoying the festivities.
Its versatility makes it even more lovable. You can customize the colors to match your party theme or add crushed cookies or fruits for fun variations. Make one large egg to slice or several small ones for personal servings. This recipe offers a playful spin on a classic favorite without sacrificing flavor or elegance.
Serving and Storage Tips
Serve your Easter Egg Cheesecake directly from the refrigerator for the firmest texture and best taste. For clean slices, use a sharp knife dipped in hot water between cuts. If you are using smaller eggs for individual servings, place them in cupcake liners for easy handling.
Leftover cheesecake should be stored in an airtight container in the refrigerator and will stay fresh for up to five days. To freeze, wrap each egg tightly in plastic wrap and place in a freezer-safe container for up to one month. Thaw overnight in the refrigerator. You can prepare the cheesecake filling up to two days ahead and pipe it into the chocolate eggs just before serving to ensure the shells remain crisp.
Course, Cuisine, Keywords
Dessert, American, Easter dessert, cheesecake, no bake dessert, spring entertaining, holiday recipes
Servings, Prep Time, Cook Time, Total Time, Serving Size
Servings: 8
Prep Time: 25 minutes
Cook Time: 0 minutes
Total Time: 25 minutes
Serving Size: 1 half egg
To make this extra special, add a few drops of almond extract for a fragrant twist or fold in crushed cookies for texture. Leftovers keep beautifully chilled and taste even better the next day.
FAQ
Can I make this without food coloring?
Absolutely. The pastel swirl is fun but optional. You can leave the cheesecake filling its natural creamy color or use natural color powders like beetroot or spirulina for a subtle hue.
What if my eggs break during cutting?
If the shell cracks slightly, you can soften some chocolate chips and use the melted chocolate to patch and reinforce the halves from the inside. Let it firm up before filling.
How do I transport these without ruining them?
Let them chill fully before transport. Then nestle each egg in a muffin liner inside a container with sides. Add paper towel or crumpled parchment to keep them snug during travel.
We hope you enjoyed this article about Easter Egg Cheesecake! Let us know what you think in the comments — we love hearing from you! And if it’s not too much trouble, please pin this article or any image from it on Pinterest and give our pin a like. It really helps us reach more readers and inspires us to keep creating delicious content for you!
Easter Egg Cheesecake
Ingredients
- 4 large hollow chocolate Easter eggs
- 16 ounces cream cheese softened
- 1 cup powdered sugar
- 1 teaspoon vanilla extract
- 1 cup heavy whipping cream
- Gel food coloring in pastel shades
- Sprinkles or candy eggs for garnish
Instructions
- Carefully unwrap the chocolate Easter eggs and using a serrated knife, gently slice them in half lengthwise along the seam. Set the halves in an egg carton or on a bed of rice in a baking dish to keep them steady.
- In a large mixing bowl, beat the softened cream cheese until smooth and creamy using an electric mixer. Gradually add the powdered sugar and continue beating until fully combined.
- Add the vanilla extract to the mixture and mix for another 30 seconds.
- In a separate bowl, whip the heavy cream until stiff peaks form.
- Gently fold the whipped cream into the cream cheese mixture with a rubber spatula until smooth and fluffy.
- Divide the cheesecake mixture into separate bowls and tint each with a few drops of pastel gel food coloring. Swirl together using a toothpick for a marbled effect or keep the colors separate for layers.
- Gently spoon or pipe the cheesecake filling into each chocolate egg half, smoothing the tops with the back of a spoon.
- Decorate with sprinkles or mini candy eggs if desired.
- Refrigerate for at least two hours to firm up before serving.
